
niji
Niji 7 Trendy 3D Characters | Midjourney Prompt Guide Part 1
Midjourney AI Team · 23 lipca 2026 · 7 min read
Keywords: niji 7 prompt, 3d character design, midjourney tutorial
Published: 23 lipca 2026 Author: Midjourney AI Team
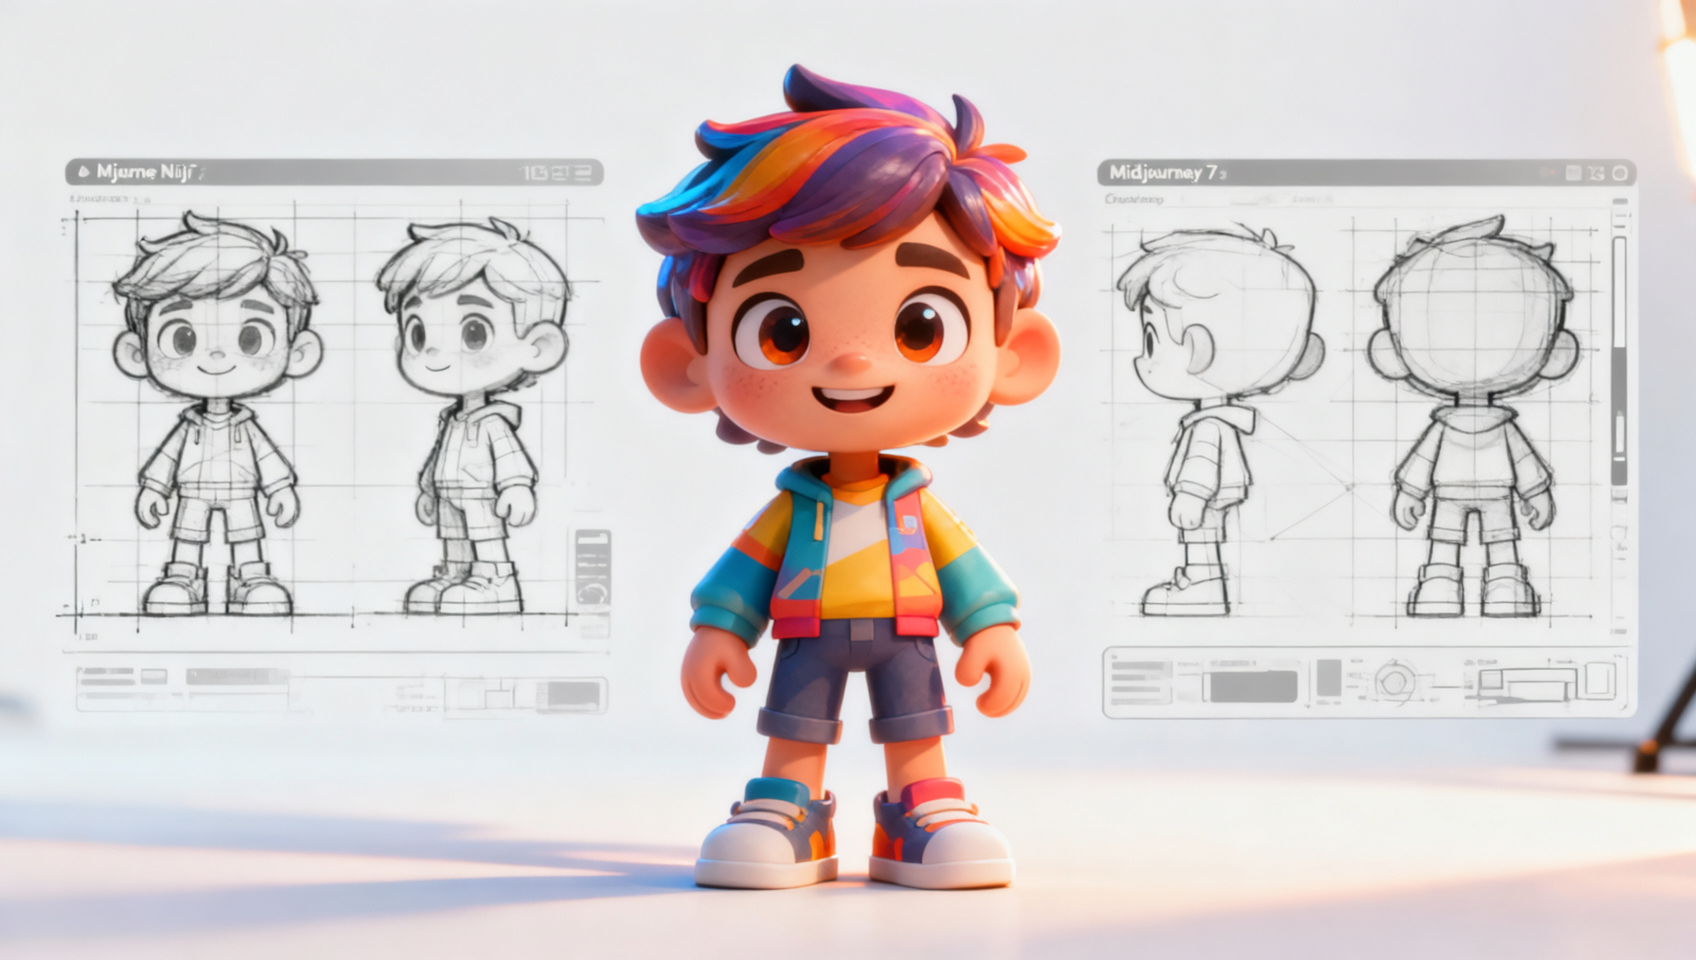
{ "title": "Trendy Postacie 3D Niji 7 | Przewodnik Promptów Midjourney", "description": "Twórz spójne postacie 3D w Midjourney Niji 7. Pełne prompty, analizy designu i tutoriale dla figurek kolekcjonerskich i IP.", "primaryTags": [ "niji", "postac-3d", "inzynieria-promptow" ], "tags": [ "midjourney", "sztuka-ai", "design-postaci", "toy-ip" ], "seo": { "keywords": [ "Midjourney Niji 7", "generowanie postaci 3D", "prompty AI", "figurki blind box" ] }, "body": "## Dlaczego Niji 7 Zmienia Zasady Gry w Designie IP 3D\n\nTworzenie spójnych, wysokiej jakości postaci 3D dla linii zabawek lub cyfrowych IP kiedyś wymagało tygodni modelowania w Blenderze lub Mayi. Dzięki najnowszej iteracji modelu Niji, konkretnie wersji 7, bariera wejścia zmieniła się dramatycznie. Ten model rozumie głębię, materiałowość i oświetlenie w sposób, którego poprzednie wersje nie potrafiły utrzymać konsekwentnie.\n\nDla projektantów i hobbystów możliwość generowania assetów „gotowych do zabawek" bezpośrednio z promptów tekstowych otwiera szybkie ścieżki prototypowania. Nie tworzysz już tylko obrazów; tworzysz potencjalne produkty. Klucz leży w zrozumieniu, jak komunikować właściwości materiałowe—jak matowe plastiki, błyszczący winyl czy miękkie tekstury pluszu—do AI.\n\nTen przewodnik rozkłada specyficzne workflow dla generowania trendowych postaci 3D. Przyjrzymy się dokładnej strukturze promptu, przeanalizujemy, dlaczego konkretne parametry mają znaczenie, i pokażemy, jak execute to w MidassAI Studio. Niezależnie czy budujesz osobistą markę, czy testujesz koncepty dla klienta, opanowanie tego stylu daje ci znaczącą przewagę w developmentie wizualnym.\n\n
Quick Takeaways
\n\n## Masterowska Struktura Promptu\n\nAby uzyskać wygląd przypominający wysokiej jakości zabawki z niespodzianką (blind box) lub figurki kolekcjonerskie, twój prompt potrzebuje więcej niż tylko opisu subjecta. Wymaga instrukcji oświetlenia i słów kluczowych silnika renderującego. Poniżej znajduje się fundamentowy prompt, którego możesz użyć natychmiast.\n\ntext\n/imagine prompt: a cute 3D trendy character, little boy wearing oversized streetwear hoodie, vibrant colors, blind box toy style, pop mart style, octane render, subsurface scattering, soft studio lighting, rim light, pastel background, high detail, 8k --ar 3:4 --niji 7 --style raw --s 250\n\n\nTen prompt został zaprojektowany z myślą o precyzji. Zauważ uwzględnienie „octane render" i „subsurface scattering". Te terminy sygnalizują AI, aby symulowało sposób, w jaki światło przechodzi przez półprzezroczyste materiały, co jest znakiem rozpoznawczym wysokiej jakości zabawek winylowych. Proporcje --ar 3:4 zostały wybrane celowo. Zapewniają wystarczająco dużo pionowej przestrzeni dla ujęcia całej postaci, zachowując jednocześnie kompozycję odpowiednią dla ekranów mobilnych lub prezentacji w portfolio.\n\nUżycie --style raw jest tutaj krytyczne. Standardowa stylizacja często dodaje artystyczny flair, który może zniekształcić geometrię 3D. Tryb Raw adheres more strictly do twoich deskryptorów promptu, zapewniając, że postać wygląda jak fizyczny obiekt, a nie cyfrowy obraz. Parametr --s 250 balansuje artystyczną interpretację z adherence do promptu, zapobiegając zbytniej abstrakcji obrazu.\n\n## Dekonstrukcja Estetyki\n\nZrozumienie, dlaczego prompt działa, pozwala ci modyfikować go dla różnych potrzeb. Rdzeń tej estetyki opiera się na trzech filarach: oświetleniu, materiale i kompozycji.\n\nKonfiguracja Oświetlenia\nPrompt specifies „soft studio lighting" i „rim light". Oświetlenie studyjne ensures even illumination across the character, redukując ostre cienie, które mogą zasłaniać detale designu. Oświetlenie konturowe (rim lighting) creates a separation between the character and the background, enhancing the 3D effect. Without rim light, postać might feel flat against the pastel background. If you want a more dramatic look, możesz zamienić „soft studio lighting" na „volumetric lighting" lub „god rays", but be careful not to lose surface detail.\n\nDefinicja Materiału\nTerminy takie jak „blind box toy style" i „pop mart style" are not just buzzwords; triggerują specific training data related to vinyl collectibles. To tells the model to smooth out textures i avoid realistic skin pores or fabric weaves that belong to photography. If you want a plush look instead, replace these terms with „felt texture" or „soft plush material." For a metallic finish, use „anodized aluminum" or „chrome finish."\n\nPaleta Kolorów\n„Vibrant colors" paired with a „pastel background" creates contrast. Postać pops because the background recedes. If you are building a brand,你应该 replace „vibrant colors" with specific hex codes or color names, such as „teal and orange color scheme" or „monochromatic blue." Consistency in color is vital for IP recognition.\n\n## Realizacja w MidassAI Studio\n\nRunning these prompts efficiently requires a stable environment. MidassAI Studio provides a streamlined interface for managing Midjourney workflows without the friction of Discord commands. Here is how to integrate this into your process.\n\n1. Access the Tool: Navigate to the Midjourney section within MidassAI Studio. The interface is designed to keep your generations organized by project rather than scattered chat logs.\n2. Input the Prompt: Copy the master prompt above into the input field. Ensure you select the Niji 7 model version in the settings panel if it is not default.\n3. Iterate Quickly: Generate a grid of four variations. Do not upscale immediately. Look for the silhouette and lighting consistency first.\n4. Refine Parameters: If the character looks too realistic, increase the --stylize value. If the hands or accessories are distorted, add --no realistic hands or focus on close-up crops using --zoom features after upscaling.\n5. Save and Organize: Use the studio's organization tools to tag successful generations. This builds a library of assets you can reference for future consistency using --cref (character reference).\n\n## Rozwiązywanie Typicalowych Problemów\n\nEven with a robust prompt, AI generation can produce anomalies. Here are the most frequent pitfalls and how to fix them.\n\nProblem: Postać Wyglada Zbyt Realistycznie\nIf your output resembles a photograph of a person rather than a toy, your lighting keywords might be too strong. Remove „subsurface scattering" and replace „octane render" with „3D render." You can also add --style raw if you haven't already, as it sometimes reduces photorealistic noise in Niji models.\n\nProblem: Niespójne Kolory\nIf you are trying to build a series and the colors shift every time, you need to lock them down. Use color anchoring in your prompt, such as „wearing a specific red hoodie #FF0000." For advanced consistency, generate one perfect image, get its URL, and use it as a character reference with --cref [URL] in subsequent prompts.\n\nProblem: Zagracone Tła\nThe prompt calls for a pastel background, but sometimes the AI adds props or scenery. To force a clean look, add --no background details or simply specify „solid color background." This is crucial if you plan to cut out the character for compositing later.\n\n## Dla Kogo Jest Ten Przewodnik\n\nThis workflow is designed for concept artists, indie toy designers, and content creators who need rapid visualisation. It is not intended for final production meshes ready for 3D printing without cleanup. However, it serves as an exceptional proof-of-concept tool. If you are validating a character design before committing to modeling, this saves hours of work.\n\nIt is also suitable for marketers needing fresh visuals for social media campaigns. The „trendy" aesthetic aligns well with current social media preferences for bright, clean, and engaging visuals. By using MidassAI Studio, you keep these assets organized and ready for deployment across different channels.\n\n## Kolejne Kroki w Twoim Workflow\n\nOnce you have generated a character you love, the work isn't done. The next phase involves consistency. Start building a character sheet by prompting for front, side, and back views using the same seed number. You can find the seed number in the job details and append --seed [NUMBER] to your new prompts to maintain noise structure.\n\nFrom there, you can experiment with different poses or outfits while keeping the facial features locked using character references. This is where the true power of the tool shines—transforming a single image into a living brand asset.\n\nReady to start building your own 3D IP library? Access the full power of Midjourney without the Discord clutter.\n\nTry Midjourney in MidassAI Studio"
}